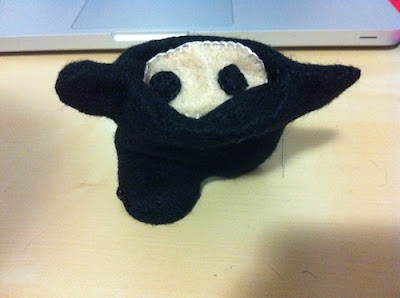
Sewing Project #1: Felt Ninja
March 28, 2011
For my first project, I needed something simple with a short time commitment so I could actually complete the project. If there's one thing that working with kids with disabilities taught me, it's that it is important to build behaviour momentum with simple achievements.
I also need something that, even if I did make a mistake, it wouldn't have detrimental long-term side-effects. If mistakes did happen, I needed a resolution that was easy, or it to be so inconsequential that I could overlook it. That's one reason I refuse to learn to hem my own pants.
Through my years of perusing craft/design-y websites, I've come across quite a few super cute felt creations. One that stuck out in my mind recently was a little ninja. Does that surprise you?
So I set about making a little ninja template.
I had to cut out separate face and eye pieces to trace because I couldn't bring myself to cut Paper Ninja up.
Then, I pinned him to a piece of black felt, making sure I didn't actually pin him.
At this point, I'm sure you think my affinity with Paper Ninja is getting a little out of hand. I assure you, it's completely healthy. I think.
I cut his body out of the black felt, twice, slightly larger than the template.
Note: You need to reserve some space between the edge of the fabric and the actual outline of your creation. I believe this is called the seam allowance.
* * * * * * *
Sewing intermission!


* * * * * * *
And we're back.
Once you've cut out all the pieces, it's time to sew! Put your pieces together so you can envision the final product if you need a little bit of motivation.
I used a blanket stitch to sew his eyes to his face, then his face to his body.
I used a whip stitch to sew the front and back of him together.
Then, very carefully, I flipped him inside out.
And then because I didn't have stuffing, I let Nathan pretend he was a puppet.
* * * * * * *
Lessons learned:
- I can cut fabric (or similar material) without having a panic attack
- This is now my favourite way to knot thread
- When using embroidery floss to sew/stitch, you separate it and use only 3 strands (or less if you want more detail)
- I now know how to do a blanket stitch and a whip stitch
I am an incredibly visual and hands-on learner and I highly recommend the tutorials I've linked. They were totally helpful to me.


2 comments:
Thank you for linking to my tutorials! Love your cute ninja (and the felt doll ... teehee!).
Could I have one, please?!
I've caught your (pl.) ninja fever!!
Post a Comment